
 Car knowledge
Top 7 German Car Maintenance Tips by Experts (2025 Update)
Many people complain that German cars aren’t the most reliable ones out here. However, what they don’t realize is that maintaining a German car requires specialized knowledge and attention to detail. Experience the ultimate in German experts car maintenance with our exclusive guide.
Learn how to maximize your German vehicle’s lifespan, improve fuel efficiency, and avoid costly repairs. Do all this while preserving its legendary German engineering.
So, without any further ado, let’s get started!
1. Replace Filters Frequently
This is the most important piece of advice anyone can give you regarding German car maintenance in the UAE. We can’t stress enough the importance of frequently changing your German car’s filters. This is true not only for the engine oil and intake air filter but also for the cabin air filter.
The oil filter is replaced by default, but many people delay replacing the cabin and intake filters. This might work in any other region, but not in the UAE. In sandy environments like the UAE, the filters can become dirty much faster than in other climates.
Therefore, regularly replacing your filters will help maintain optimal engine efficiency and avoid harsh engine vibrations. It will also prolong the engine’s lifespan of your dear German car.
2. Top Up with Genuine Engine Oil
Engine seizures are a common occurrence with German cars in the UAE. However, you can avoid it with one simple maintenance tip. Always use the brand-specific genuine engine oil in your car. Also, refer to your user manual for guidance on the recommended oil type and viscosity.
German vehicles are engineered with specific requirements, and using the wrong oil can lead to serious issues down the line. Brands like BMW, Audi, and Mercedes-Benz have unique formulations designed to meet their vehicles’ specific needs. Using generic or low-quality oils can lead to increased engine wear, reduced fuel efficiency, and potentially costly repairs.
Regular oil changes help keep your engine clean and functioning optimally. In hot climates like the UAE, using high-quality oil helps prevent overheating and ensures smooth engine operation.

3. Check Transmission Fluid Level
The transmission systems in German cars are highly sophisticated and require regular attention. In the UAE’s harsh climate, where temperatures can affect transmission and brake fluid viscosity, frequent transmission fluid checks become even more important. Therefore, you should check your transmission fluid level at least once every few months or before long trips.
If you notice any signs of fluid leaks or if your transmission starts to behave erratically, address it immediately. Plus, it is also vital to have your transmission fluid replaced according to your manufacturer’s recommendations. This helps remove contaminants that accumulate over time and ensures that your transmission operates smoothly.
4. Maintain Optimal Tire Pressure
Another complaint we often hear from German car owners is that their cars aren’t handling how they used to. No need to get worried about it. It’s mostly because you didn’t maintain optimal tire pressure, and now your tires are worn out.
High temperatures can cause tire pressure to increase significantly. If left unchecked, this could lead to blowouts or decreased handling capabilities. You should check the tire pressure of your German car on a weekly basis, especially before long trips. To maintain optimal tire pressure, refer to your vehicle’s user manual for the recommended PSI levels.
Plus, you should inspect tires for signs of wear or damage. Look for uneven tread wear patterns or visible cracks in the rubber. Keeping tires in good condition not only enhances safety but also improves overall driving comfort and fuel economy.

5. Use High-Quality Fuel
German cars are known for their superior performance. However, the buzz of driving a German car can quickly fade if you are not using high-quality fuel. Not only that but using low-quality fuel can also lead to engine knocking and reduced efficiency over time. High-quality fuel helps keep your engine clean by preventing carbon buildup on the throttle body, injectors, and valves.
In addition to choosing high-quality fuel, consider using fuel additives designed specifically for German vehicles. If you often drive under harsh conditions or notice performance issues, using fuel additives can help. Fuel additives help clean injectors and improve the engine performance.
6. Regularly Inspect Electrical System
Another complaint car dealerships hear about German cars is that the convenience and tech-enabled features aren’t working properly. Now, German vehicles are loaded with cutting-edge features. But that’s the thing with high-end luxury cars. The features can become irresponsive or erratic after some time if you don’t give proper care and attention.
The latest features in German cars don’t function on their own. They are managed by advanced electrical systems that need special attention. Regular inspections of these systems are vital to ensure everything functions properly. You should periodically check all electrical components.
In addition to visual inspections of lights and indicators, pay attention to battery health. The extreme temperatures in UAE summers can shorten battery life significantly if not monitored regularly. Consider having your battery tested whenever you notice signs such as lag in convenience features, slow starts, or dimming lights.
7. Wash Your German Car Regularly
Last but not least, you should wash your German car regularly and properly if you plan on keeping it healthy. UAE is a desert region where frequent sandstorms introduce debris into various car components. Sand accumulation not only affects aesthetics but can also lead to corrosion if left unchecked over time. A simple car wash can save you a ton in repairs.
You should aim to wash both the exterior and undercarriage of your vehicle every two weeks at a minimum. Do it more often during periods of heavy dust accumulation or after sandstorms occur! Wash brake pads and tires thoroughly to keep them running properly.
Regular washing removes salt deposits from coastal areas along with dirt buildup caused by sandy roads. Both these things contribute significantly to premature wear on paintwork as well as mechanical components beneath it!
Additionally, consider applying wax after washing. This adds an extra layer of protection against UV rays while enhancing shine! Don’t forget about interior cleaning, either. Dust accumulation inside affects air quality, leading back to the cabin filters we discussed earlier!

Final Word: German Experts Car Maintenance Tips
So, there you have it: the top 7 German car maintenance tips by Experts in the UAE.
From routine checks to advanced diagnostics, these tips are tailored to meet the unique demands of the region’s challenging climate. This guide provides invaluable insights into troubleshooting and preventative maintenance of German cars.
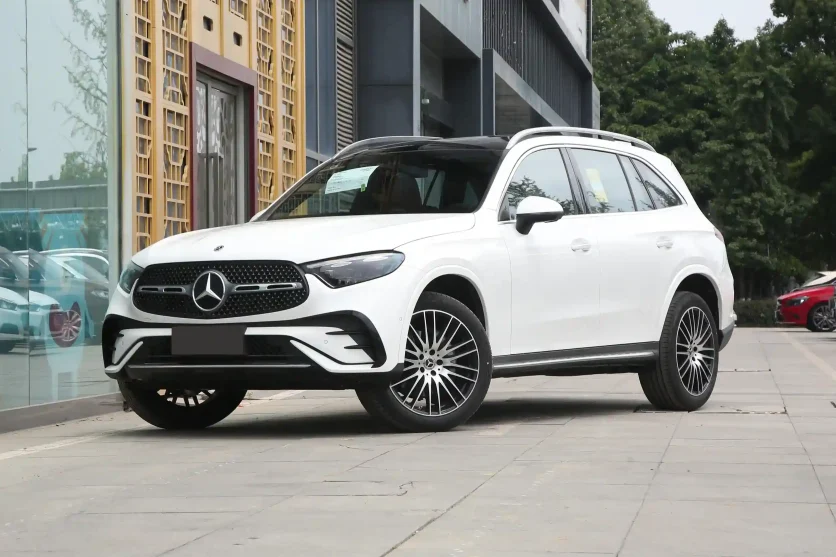
Are you looking to import cars from German brands like Audi, BMW, Mercedes-Benz, and Volkswagen? GuangcaiAuto is your trusted partner in importing the best German cars from China.
With a selection of used and new cars, cost-effective shipping, and affordable pricing, we make the whole process of importing cars from China to the UAE seamless.
You can directly place an order on our website or contact us to discuss your options. Please explore our blog for the latest news and offers from the Chinese auto market.
 Car knowledge
10 Practical Tips to Extend the Range of Your EV and PHEV!
Does your EV drive for as long as the manufacturer claimed? Or does it fall short of its promise? Don’t worry. In today’s blog post, we’ll discuss the 10 practical tips to extend the EV range.
It’s possible that even after following these tips, you still won’t be able to achieve your EV’s claimed range. But it’ll help you translate the last drop of battery power into usable range.
So, without any further ado, let’s get started!
1. Avoid the Temptation to Accelerate Instantly
If you’re struggling with your EV’s range, this might be the reason. EVs accelerate fast. The thrill of pressing the accelerator and feeling the instant torque delivered to the wheels is amazing. However, this amazing feeling comes at the cost of rapid battery drain.
So, what you need to do is avoid the temptation to accelerate instantly. By easing into the throttle, you minimize energy consumption and maximize range. This practice not only extends your driving range but also enhances the overall lifespan of your battery.

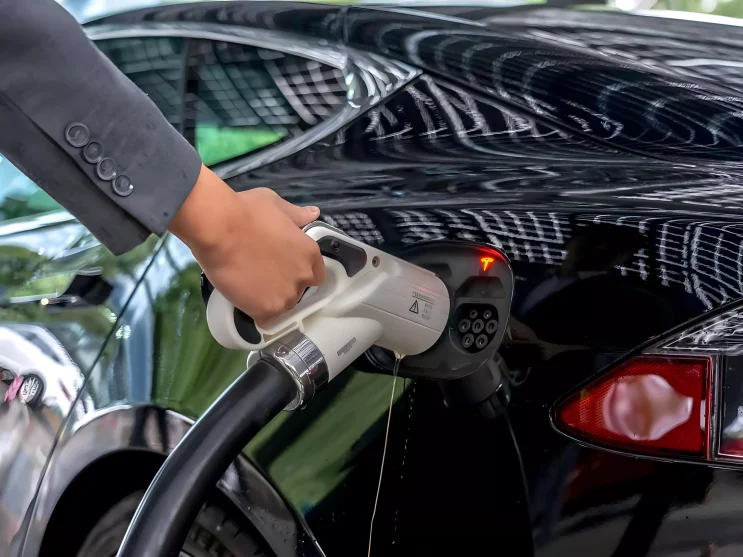
2. Avoid Frequent Rapid Charging
Many EV owners know that frequent rapid charging can negatively affect battery lifespan. However, it is a common misconception that this impact is limited solely to longevity. In reality, frequent rapid charging can also influence the overall performance and driving range of an EV.
Rapid charging raises the battery temperature beyond the optimal range. So, in the following hour or two, you might experience a reduction in power output. This is due to thermal effects that can cause increased internal resistance, leading to diminished efficiency and performance.
Therefore, you should always keep your charging habits balanced to squeeze the most range out of your EV. Avoid frequent rapid charging and use high-quality EV home chargers.
3. Drive at 80% of the Given Speed Limit
To get the most out of your EV, you should always watch your speed. Higher speeds require more energy to maintain, significantly reducing your EV’s range. On the other hand, driving at a slower, more relaxed pace can extend your vehicle’s range.
Studies show that you can save up to 14% battery power if you reduce speed by just 15 kmph. A good practice is to drive at 80% of the given speed limit on any road. What this will do is reduce the need for braking. Also, it would allow for a smoother driving experience.

4. Use Regenerative Braking If Available
Regenerative braking is a key feature of many EVs that captures energy during deceleration. Instead of wasting kinetic energy as heat, regenerative systems convert it back into electrical energy. This energy is then used to recharge the battery as you slow down.
You can add up to 25% of driving range to your EV batteries by using this feature effectively. However, this is only true for EVs with regen braking systems. Therefore, when buying an EV from China or anywhere, it is essential to look for this feature.

5. Keep an Eye on the Tire Pressure
Tire pressure plays a crucial role in your EV’s efficiency. Both over and under-inflated tires can reduce your driving range. Under-inflated tires increase rolling resistance, and over-inflated tires lead to decreased traction. Both conditions cause the vehicle to consume more energy to move.
So, always make sure that your EV tires are optimally inflated. This simple maintenance task not only extends the driving range but also enhances overall driving safety.

6. Don’t Use Unnecessary Convenience Features
Today, EVs are equipped with numerous convenience features that can drain battery power. Functions like power seats, audio, and infotainment systems consume energy. This energy could otherwise extend your driving range. Limiting their use conserves battery life.
Be mindful of how often you use these features, especially on short trips. You should minimize unnecessary use of these features to improve your EV’s overall range during your travels.

7. Avoid Stop-and-Go Traffic
Stop-and-go traffic can be detrimental to an EV’s range due to frequent acceleration and braking cycles. Even regenerative braking cannot compensate for energy lost during constant acceleration and deceleration. This leads to reduced efficiency and lost battery power.
Therefore, if possible, plan your route to avoid heavy traffic areas and minimize the number of stops you make. Use navigation apps to help you find smoother routes.

8. Don’t Waste Battery Power on Heat
In fuel-powered vehicles, there are a lot of power losses in the form of heat. This heat is used to warm the cabin. However, with EVs and PHEVs, there aren’t as many losses. Therefore, the energy to heat the cabin comes directly from their batteries. This can reduce your range considerably.
So, instead of relying on the heater during colder months, consider using seat warmers or dressing warmly. This small adjustment can make a difference in how far you can travel on a single charge.
9. Choose Driving Modes Wisely
Most EVs have various driving modes, with some offering up to 10 different modes. These modes are designed to optimize performance and efficiency under different driving conditions. You should familiarize yourself with these modes if you want to extend your EV’s range.
In most scenarios, choosing to drive in the Eco mode might be the best choice. It limits the top speeds and acceleration levels while optimizing the overall power consumption.
However, this is not always true. For instance, a specialized off-road mode might be more well-suited to reduce power consumption on off-road terrains.

10. Watch Out for the Weather
Lastly, the impact of weather on the range of an EV is something you should be aware of. Most of the time, you cannot do anything about it, but what if you could? So, let’s discuss it.
Cold weather can reduce an EV’s range by as much as 12% when temperatures drop to around 20°F (-6°C). This is due to the need to use the cabin heating functions in colder weather.
Conversely, in hot weather up to 95°F (35°C), EVs may lose about 4% of their range. This happens due to the excessive strain on the battery. This loss may go up to 17% when cooling is employed.
Additionally, wind conditions can also affect range. Driving against a headwind reduces the range by up to 15%. In contrast, a tailwind can improve range by about 10% due to decreased resistance.
Icy or snowy conditions present another challenge. They necessitate greater use of traction control systems and increase rolling resistance. This can further diminish the range.
To mitigate these impacts, you should consider preconditioning your vehicles while still plugged in. It allows for cabin heating or cooling without depleting battery reserves during travel.

Final Word: How to Extend the Range of Your Electric Vehicle?
Implementing these 10 tips can significantly extend the range of your EV or PHEV and improve its overall performance. Remember, every little bit counts. At times, gaining even a few kilometers in range will make a difference in your daily commute. It allows you to reach your destination without the stress of finding a charging station.
Are you looking to import a long-range electric car from China? GuangcaiAuto is your trusted partner in importing the best Chinese EVs.
With a selection of 60+ worldwide car brands, cost-effective shipping, and affordable pricing, we make the whole process seamless.
You can directly place an order on our website or contact us to discuss your options. Please explore our blog for the latest news and offers from the Chinese auto market.
 Car knowledge
8 Reasons Why Car Vibrates When Idle (+How to Fix it?)
Has it ever happened to you that your car vibrates when idle?
It is a normal occurrence with cars driven over 100,000 km. While driving, the car is going smoothly, but as soon as you stop the car at a signal or anywhere, it starts shaking. Again, when you start driving, the car goes smoothly. This issue can be very frustrating.
But don’t worry. Today, we’ll cover the causes of car vibrating while idling in detail. In addition, we’ll also cover how to fix it so you can continue to drive smoothly on the road.
Is it Normal for a Car to Vibrate While Idling?
Yes, it is normal for a car to vibrate slightly while idling. These vibrations can be felt at the steering wheel and brake pedal. These slight vibrations are a result of the engine’s operation. When the engine shaft is disconnected from the transmission, the engine mounts may not be able to absorb all the vibration. As a result, you may feel that the car is shaking a bit.
However, there is a difference between slight vibrations and excessive shaking. While slight vibrations are normal, excessive shaking is indicative of a bigger issue. Especially when excessive shaking is accompanied by other symptoms such as noises, engine misfiring, and overheating. It means that critical engine components have gone bad or aren’t functioning properly. Excessive shaking is when you need to take prompt action and resolve the underlying issue.
8 Reasons Why Your Car is Shaking When Idle
Here are the 8 leading causes you should investigate if your car is vibrating excessively.
1. Bad Spark Plugs
A bad or faulty spark plug can cause a car to vibrate while idling. Spark plugs play an important role during the combustion process in SI (Spark Ignition) engines. When spark plugs become faulty, they fail to ignite the air-fuel mixture in the engine cylinders effectively. This leads to incomplete combustion, which can cause engine misfires. Each misfire results in a momentary loss of power in one or more cylinders. As the engine struggles to maintain a smooth idle, the vibrations become particularly noticeable at low RPMs when the vehicle is stationary.
How to Fix this Issue?
To resolve this issue, you must take your car in for servicing. A mechanic will clean and adjust the spark plug clearance. However, if the spark plugs have reached their lifespan, it might be necessary to replace them to get rid of the vibrations.

2. Low Engine Oil
When engine oil is insufficient, it leads to decreased lubrication of vital components such as bearings and piston rings. This lack of lubrication increases friction and wear, which can cause the engine to run unevenly. Consequently, the engine may vibrate more noticeably at low RPMs due to the imbalance created by these mechanical stresses.
How to Fix this Issue?
To avoid this issue, check engine oil levels once a week. If the oil has become excessively dirty, you might have to replace it.

3. Worn-Out Timing Belt
When a timing belt wears out, it can become stretched or frayed. This can lead to misalignment between the crankshaft and the camshaft. When the timing is off, the pistons and valves may not move in sync, leading to uneven combustion. This uneven combustion can cause the engine to vibrate, particularly at idle when the engine is under less load.
How to Fix this Issue?
The timing belt is generally an irreparable component. So, if the timing belt or timing chain has become worn out, the only thing you can do is replace it immediately.

4. Faulty Fuel Injectors
Faulty fuel injectors can cause a car to vibrate while idling due to inconsistent fuel delivery. If an injector is clogged or leaking, it may not deliver the correct amount of fuel to the cylinder, causing the engine’s combustion to be uneven. This imbalance in the combustion process can lead to the engine shaking or vibrating. Additionally, if a fuel injector is completely stuck open or closed, it can disrupt the engine’s timing and cause severe vibrations.
How to Fix this Issue?
At times, the vibration issue can be resolved by cleaning the fuel injectors. You can buy a fuel injector cleaner and pour it into injectors to eliminate carbon build-up. But if the fuel injectors are beyond cleaning, you may have to replace them.

5. Broken Engine or Motor Mounts
Engine mounts are designed to secure the engine and absorb vibrations generated during operation. When these mounts become worn, cracked, or broken, their ability to dampen vibrations diminishes. Consequently, the engine’s vibrations are transferred directly to the vehicle’s chassis and cabin. You may feel this vibration through the steering wheel, seats, and dashboard.
How to Fix this Issue?
If the vibrations are due to broken engine or motor mounts, you will need to replace them. The mounts themselves are quite cheap, but installing new mounts is a time-consuming process. You need to remove the complete engine to install new mounts.
6. Blocked Air Filter
A blocked air filter could be the culprit if you’re experiencing a vibrating car while idling. The air filter’s job is to keep dirt and debris out of your engine. When the filter becomes clogged, it restricts airflow to the engine. This reduced airflow can lead to uneven combustion, causing the engine to misfire. Misfires are the root cause of the vibration you’re feeling.
How to Fix this Issue?
Air filters are usually replaced during scheduled vehicle maintenance. However, if your vehicle is old or if you drive in unclean surroundings, it is recommended that you change the air filter earlier. You can also clean the air filter with blowers to prolong its lifespan.

7. Vacuum Leaks
Over time, the hoses and connections of the car’s intake manifold can develop leaks. When there is a vacuum leak in the intake manifold, it may draw in excessive air. This excessive air can bypass the throttle body and enter the engine without being properly mixed with fuel. This imbalance in the air-fuel ratio can lead to irregular combustion, causing the engine to vibrate. The severity of the vibration often depends on the size and location of the leak.
How to Fix this Issue?
If there are vacuum leaks, the rubber hoses with leakage usually need to be replaced. It might be difficult to pinpoint the leakage point, so sometimes, multiple hoses need to be replaced.
8. Faulty Oxygen Sensor
When an oxygen sensor malfunctions, it sends incorrect data to the ECU. This can cause the engine to run either too rich (too much fuel) or too lean (not enough fuel). This imbalance results in rough idling and vibrations. You might feel these vibrations when the engine is idling as it struggles to maintain a stable idle speed. Additionally, a faulty oxygen sensor can also contribute to other issues like decreased fuel economy, reduced engine power, and even difficulty starting your car.
How to Fix this Issue?
It might be possible that the oxygen sensor is malfunctioning because it isn’t properly calibrated. A skilled mechanic might be able to do it for you. However, if the oxygen sensor has reached its lifespan, you might have to replace it.

Final Word: 8 Reasons Why Car Vibrates When Idle
So, there you have it: 8 reasons why a car vibrates when idle. By keeping an eye out for these issues, you can avoid costly repairs and rectify the root cause early on.
However, please remember that slight vibrations are normal while idling. Similarly, after you have changed the engine oil, the car might vibrate for some time. So, you should always consult an expert mechanic before reaching any conclusion.
Are you looking to import cars from China? We can help!
GuangcaiAuto is your partner in importing reliable, efficient, cheap Chinese cars. We offer cars from 60+ worldwide auto brands. With our efficient shipping and streamlined import process, bringing your dream car to your doorstep is easier than ever.
Get in touch with our sales team for more information, and don’t forget to explore our blog for the latest news and offers from the Chinese car market.
 Car knowledge
8 FAQs About EV Home Charging Stations (Charging Piles)
EV prices are dropping approximately 18% every year. This marks a new era of EV adoption. As the number of electric vehicles grows, so does the need for charging infrastructure. This blog post aims to shed light on one of the crucial components of this infrastructure: EV home charging stations, also known as EV charging piles.
We’ll delve into 8 frequently asked questions about EV home charging stations, providing you with valuable insights into their installation, charging times, costs, compatibility, and more.
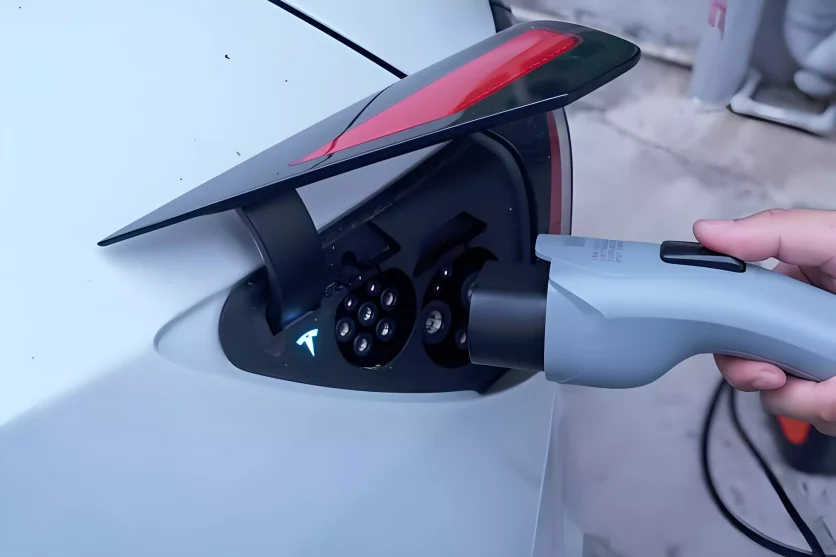
1. What is an EV Home Charging Station?
An EV home charging station is a piece of equipment designed for charging electric vehicles. Home EV charging stations serve as standalone units that convert electricity from the grid into a form suitable for charging EV batteries. They can be installed in various locations, including residential areas, commercial buildings, and public parking lots.
Charging stations offer a range of power outputs, from 3 kW to 22 kW, catering to both regular and rapid charging needs. Regular stations utilize standard AC voltage (220V or 380V), while rapid charging stations often employ higher DC voltages. Charging stations are equipped with various connector types, ensuring compatibility with different vehicles.

2. What are the Differences Between Charging Stations and Piles?
Although synonymous terms, there are some key differences between both terms. The following table highlights the key differences between charging piles and charging stations:
| Feature | Charging Piles (EV Home Charging Stations) | Charging Stations |
| Usage | Suitable for home and small-scale commercial use. | Designed for high-demand environments. |
| Power Output | Typically, from 3 kW to 22 kW. | Generally, from 50 kW to 350 kW. |
| Charging Points | Usually provides one charging point per unit. | Multiple charging points available for several vehicles at once. |
| Charging Speed | Slower charging speeds compared to DC fast charging stations. | It varies, but DC fast charging stations are very fast. |
| Installation Costs | Lower installation costs | Higher installation costs |
| Technology Integration | It may include smart features. | Usually, it has smart grid features and monitoring systems. |
| Payment Interface | Usually, it has no or basic payment interface as it is used in private settings. | It has payment systems as it is intended mainly for public use. |
| Accessibility | It can be publicly accessible or privately owned. | Primarily located in high-traffic areas like shopping centers and transportation hubs for public access. |
3. What are the Different Types of Electric Vehicle Home Charging Stations?
Home charging stations can be divided into various types based on different parameters like installation method, location, interface, and charging speeds:
- Based on Installation
- Vertical charging stations stand independently and are suitable for outdoor or residential parking spaces, as they do not require wall support.
- Wall-mounted charging stations need to be fixed to a wall and are ideal for indoor or underground parking environments.
- Based on Accessibility
- Public charging stations are installed by public service organizations for general use and are typically found in public parking lots.
- Commercial charging stations are designed for specific enterprises serving customers and staff and are often located in places like shopping mall parking lots.
- Private stations are installed in personal areas and are not accessible to the public.
- Based on Location
- Indoor charging stations are suitable for sheltered environments.
- Outdoor charging stations can withstand harsh weather conditions.
- Based on Capacity
- Single charging stations can charge one vehicle at a time.
- Multi-charging stations can charge multiple vehicles simultaneously.
- Based on the Current Type
- AC charging stations have lower current outputs and take longer to charge.
- DC charging stations provide higher current outputs for fast charging.

4. How Long Does it Take to Charge an EV on a Home Charging Stations?
The charging time for an electric vehicle (EV) depends on several factors, including:
- Battery size: Larger batteries take longer to charge.
- Power output: Higher power output results in faster charging.
- Current charging level: A depleted battery takes longer to charge.
Here’s a breakdown of charging times for different types of charging stations:
Level 1 Charging Stations: They use 110V-120V power sources. Due to its low power output, a full charge can take anywhere from 10 to 20 hours. This option is often used in residential settings where charging can occur while the vehicle is parked overnight.
Level 2 Charging Stations: They use 220V/240V power sources. It offers faster charging times compared to Level 1, typically taking 2 to 10 hours for a full charge. Level 2 stations are found in commercial settings, workplaces, and public parking lots.
Level 3 Charging Stations: Level 3 stations provide direct current (DC) power, allowing for much quicker charging times. It can charge an EV battery to 80% capacity in as little as 20-45 minutes. Primarily located along highways, they are ideal for long-distance travel.

5. Should You Charge Your EV Only Up to 80% on an EV Charging Station?
Yes, you should charge your electric vehicle (EV) only up to 80% on a charging station. It is also known as the 80% rule for EV charging. This practice can help maintain the health and longevity of your EV’s battery. Charging to full capacity can accelerate chemical reactions that degrade the battery over time, while limiting the charge to 80% reduces voltage stress.
Additionally, the charging rate slows after 80%. EVs take nearly as long to charge from 80% to 100% as they do from 20% to 80%. By stopping at 80%, you can reduce charging times considerably. Moreover, higher states of charge can lead to increased thermal stress. Capping the charge at 80% reduces the chances of overheating and associated damage.
6. How Much Does it Cost to Install a Home EV Charging Station?
The cost of installing a home EV charging station can vary depending on several factors. For instance, the complexity of the installation site may necessitate additional electrical work, such as upgrading existing wiring or installing new circuits. Labor costs can also vary based on regional rates and whether permits are required. Furthermore, businesses may need to consider ongoing expenses associated with maintenance and network connectivity if they opt for smart charging stations.
Generally, here are the approximate costs for the 3 major types:
- Level 1 charging station: Relatively inexpensive, typically ranging from $500 to $1,000.
- Level 2 charging station: More expensive, with costs ranging from $2,000 to $5,000.
- DC fast charging station: The most expensive option, with costs typically ranging from $10,000 to $50,000 or more.

7. How Much Does it Cost to Charge an EV on a Charging Station?
The cost of charging an EV at a charging station mainly depends upon the cost of electricity. Plus, it also depends upon factors like charging efficiency and battery size. You can use the following formula to calculate the charging costs:
Charging cost = Battery size in kWh x Charger efficiency x per kWh cost
On average, charging an EV costs around $0.05 per mile. Level 2 stations typically charge between $0.10 and $0.40 per kWh. Similarly, a DC fast charging station (Level 3) can charge from $0.20 to $0.60 per kWh or more, depending on the provider and location. You can also benefit from exclusive charging networks such as Tesla Superchargers to save money.
8. Can You Install an EV Charging Station Outdoors?
Yes, you can install an EV charging station outdoors, but there are specific requirements to ensure safety and functionality. One of the key considerations is the protection level. Outdoor charging station must have a minimum protection rating of IP54, which safeguards them from wind, rain, and other harsh environmental conditions. In addition to protection, outdoor chargers should be equipped with insulation to prevent electrical hazards and ensure safety.
9. Excellent Suppliers of EV Charging Stations in China
BESEN
BESEN is a premier manufacturer of electric vehicle supply equipment (EVSE) with over 14 years of experience and a global presence in 73 countries. Known for its innovation, BESEN provides safe, efficient, and reliable EV charging solutions for both families and businesses. Their product line includes portable chargers and charging stations, and the company offers ODM and OEM services, catering to the specific needs of its partners and customers.

Sino Energy | Global Leader in Charging Solutions | Partnering With Top Global Brands
Sino Energy was established in 2006 and is a wholly-owned subsidiary of Zhuhai Pilot Technology Co., Ltd(stock code: 831175).
Sino Energy is dedicated to providing efficient and reliable EV charging solutions to markets across over 90 countries. With 18 years of project experience, they remain at the forefront of innovation in the electric vehicle charging industry,
offering one-stop solutions to meet our customers’ needs.

Final Word: 8 FAQs About EV Home Charging Stations
So, there you have it, everything you need to know about EV home charging stations. By understanding the different types of charging stations, their charging times, installation costs, and compatibility, you can make informed decisions about your EV charging needs.
Looking for an electric car from China? You can import one from China at a highly affordable price. GuangcaiAuto brings you a variety of reliable and efficient electric cars.
We offer electric cars from 60+ worldwide auto brands. With our efficient shipping and streamlined import process, bringing your dream EV to your doorstep is easier than ever.
Get in touch with our sales team for more information, and don’t forget to explore our blog for the latest news and offers from the Chinese car market.
 Car knowledge
9 Tips for Desert Driving in the Middle East
The unique environmental conditions, such as extreme heat and dust storms, can increase the risk of accidents in desert driving. For instance, in Qatar, about 20 to 25 accidents occur every Friday during a popular recreational activity known as “dune bashing.”
Now we know that it’s kind of a sport. But what if you need to drive in a desert in the Middle East otherwise? How do you do it safely? If you live in a country like the UAE, Qatar, or Saudi Arabia, desert driving is a common phenomenon for you.
This guide will delve deeper into 9 tips you must follow for safe desert driving in Middle Eastern countries. So, without any further ado, let’s get started!
Tip#1: Take an Off-roading Course
Proper training is essential for safety and skill development before embarking on off-roading adventures in the UAE, Qatar, Saudi Arabia, or other Middle Eastern countries. So, even before you think of driving in a desert, we recommend taking an offroad driving course from a reputed driving institute. It’ll boost your confidence when navigating challenging terrains.
Numerous certified institutes offer off-roading courses tailored for various skill levels. These courses cover essential off-roading techniques across diverse terrains, including sand, gravel, and mud. They range from basic to advanced levels, with prices starting at approximately AED 1,500 and going up to AED 9,000 for more comprehensive training options.

Tip#2: Start Safe and Slow
Before going for desert driving, ensure your vehicle is well-prepared. Here are some tips:
- Always begin with a full tank of fuel.
- Ensure that your vehicle has been recently serviced.
- Check that engine oil and coolant levels are topped up.
- Drive in a group to enhance safety and learn from more seasoned off-roaders.
- Beginners should always take it slow. Starting at a slow pace allows you to gauge your vehicle’s handling and helps prevent accidents.
Tip#3: Make Sure You Have a Proper 4×4 Vehicle
Having the right vehicle is fundamental for successful off-roading. A proper 4×4 vehicle is designed to handle rough terrains and sandy conditions effectively. Here are some features to consider when selecting your vehicle:
- High Ground Clearance: It is one of the most critical features for any off-road vehicle. Vehicles with high ground clearance can easily navigate over rocks, logs, and other obstacles without risking damage to vital components like the oil pan or exhaust system.
- 4×4 Drive Capability: With a 4×4 system, drivers can maintain better control over their vehicle in challenging conditions, reducing the risk of getting stuck or losing traction. Plus, many modern 4×4 vehicles come with selectable driving modes (e.g., mud, sand, rock) that optimize performance based on terrain type.
- Robust Tires: Wider tires increase the contact surface with the ground, which improves traction and reduces the likelihood of getting stuck in soft terrain. Also, off-road tires are built to withstand rough conditions, including punctures from sharp rocks or debris.
- Water Fording Capability: If you plan to cross streams or puddles, check the vehicle’s water fording depth to ensure it can handle wet conditions.

Tip#4: Analyze the Terrain You’re Driving On
Understanding the terrain is crucial for effective off-roading. The type of sand you encounter can greatly influence your driving strategy:
- Soft Sand: Soft sand is often loose and fluffy, making it difficult for vehicles to gain traction. To avoid getting stuck, you must drive at higher speeds. This helps keep your vehicle on top of the sand rather than sinking into it.
- Hard Sand: Hard sand is more compact and provides better traction compared to soft sand. It is often found near tidal zones or areas. You can drive at lower speeds on hard sand, which allows for better control and maneuverability.
- Salt Flats: Salt flats are unique terrains characterized by a crusty surface formed by evaporated saltwater. While they may appear solid, some areas can be deceptive and resemble quicksand. Always approach salt flats with caution. Some sections may have hidden depressions or softer areas that can trap your vehicle.
Tip#5: Analyze the Depth of a Dune
Dunes can vary in height; some may reach up to 100 meters or more. Not all dunes have a gentle slope on the other side. Some may drop steeply, which can lead to falls or injuries if approached too quickly. The surface of a dune may conceal rocks, vegetation, or other hazards that could pose risks to your safety. Here’s how to navigate dunes safely:
- Use Landmarks: Look for flags or other markers that indicate where the dune’s slope ends. These landmarks can provide crucial information about the terrain beyond the dune.
- Assess Visibility: If you cannot see over the dune, proceed with caution. If possible, wait until you can clearly see what lies ahead before crossing. This may involve climbing a nearby dune or finding a vantage point that offers a better view.

Tip#6: Have Desert Safety Equipment and Auto Repair Kits
Being prepared with the right equipment is crucial for safety during off-roading. These include:
- Towing Ropes and Shackles: Heavy-duty ropes for recovery, along with soft shackles.
- Traction Boards: These can help get a stuck vehicle moving again.
- Shovel: A full-sized shovel is preferable for effective sand displacement.
- GPS Device or Smartphone: Ensure offline maps are available.
- Safety Flags: To increase visibility in open desert areas.
- Spare Tire and Jack: Preferably hydraulic to change tires safely in sandy conditions.
- Air Compressor: Necessary for adjusting tire pressure before and after driving in the sand.
- Food and Water: Adequate supplies for hydration and energy during long drives.
- Headlamp or Torch: Useful for visibility at night or during emergencies.
- Gloves and Protective Goggles: For personal protection while working on your vehicle.
- Walkie-Talkies: For communication if traveling in groups in areas without service.
- First Aid Kit: It should include bandages, antiseptics, and other medical supplies.
- Portable Jump Starter: This allows you to start your vehicle without another car.
- Basic Repair Kits: Include tools for minor repairs that may be needed during your trip.
Tip#7: Deflate the Tires
Deflating your tires before hitting sand improves traction. For most situations, between 15-18 PSI is advisable. If you get stuck, you can reduce it further to as low as 10 PSI or even 5 PSI temporarily. Lower tire pressure allows tires to flatten out, creating a larger contact area with the sand. But after navigating through soft sand, remember to re-inflate your tires back to safe tire pressure levels to prevent damage.

Tip#8: Watch Out for the Storms and Weather
Desert conditions can be extreme, especially during the summer months (May to October) when temperatures soar. To ensure safety:
- Plan Early Drives: Schedule outings early in the morning (around 6 or 7 AM) to avoid midday heat, which is bad for you and your vehicle.
- Monitor Weather Reports: Stay informed about potential storms or weather changes that could impact visibility or road conditions.
Tip#9: Beware of the Surrounding
Maintaining awareness of your surroundings while driving in the desert is essential:
- Safe Distances: Keep a safe distance from other vehicles to avoid collisions or getting stuck if someone else encounters trouble.
- Observe Wildlife: The desert may seem barren, but it hosts various wildlife, such as camels and oryxes. Be cautious not to hit them while driving.
Final Word: Desert Driving in the Middle East
So, there you have it: 9 tips for desert driving in the Middle East. By following these guidelines, you’ll be well-prepared to safely navigate the region’s diverse and challenging terrain. Remember that desert driving is no ordinary road trip. Safety is paramount. Always be prepared for the unexpected, and never underestimate the power of nature.
Looking to import cars from China to UAE or other Gulf countries? We can help. GuangcaiAuto is your partner in importing reliable and efficient Chinese cars of all categories.
We offer cars from 60+ worldwide auto brands. With our efficient shipping and streamlined import process, bringing your dream car to your doorstep is easier than ever.
Get in touch with our sales team for more information, and don’t forget to explore our blog for the latest news and offers from the Chinese car market.
 Car knowledge
8 Easy Steps to Change the Brake Oil
Brake oil is one of the most critical fluids in your car, and it can directly impact the safety of riders. If you’re looking to do a brake oil change yourself, this 8-step guide can help. In addition to that, we’ll also discuss the frequency and symptoms of a brake oil change.
So, without any further ado, let’s get started!
Why Do You Need to Change the Brake Oil? How Often Should You Do It?
Brake oil, also known as brake fluid, is a hydraulic fluid that transmits pressure from the master cylinder to the brake calipers, pushing the brake pads against the rotors. Brake fluid is hygroscopic, meaning it absorbs moisture over time, which can lower its boiling point and lead to reduced braking performance, potentially compromising your safety.
Depending upon your driving habits and external conditions, you should change the brake at least every three years or after 45,000 miles (72,000 km). However, you must check the brake oil levels after every six months or 10,000 miles (16,000 km). You should always refer to your car’s owner’s manual to know the exact interval of the brake oil change.

What are the Symptoms that You Need to Change the Brake Oil?
Here are some common symptoms that you need to change the brake oil:
- Low brake oil level
- Brake warning light lit up on the dashboard
- Spongy or soft brake pedal
- Increased stopping distance
- Brake pedal going to the floor
- Vehicle pulls to one side
- Yellowish or brownish puddles under your vehicle
- Burning smell after heavy braking
- Unusual noises, such as grinding or squeaking, while braking
- Dirty or discolored brake oil appearance

8 Easy-to-Follow Steps to Change the Brake Fluid
Once you have determined that the brake oil in your car needs to be changed, here’s how to do it:
Step#1: Gather Supplies
Before you begin, ensure you have the following supplies:
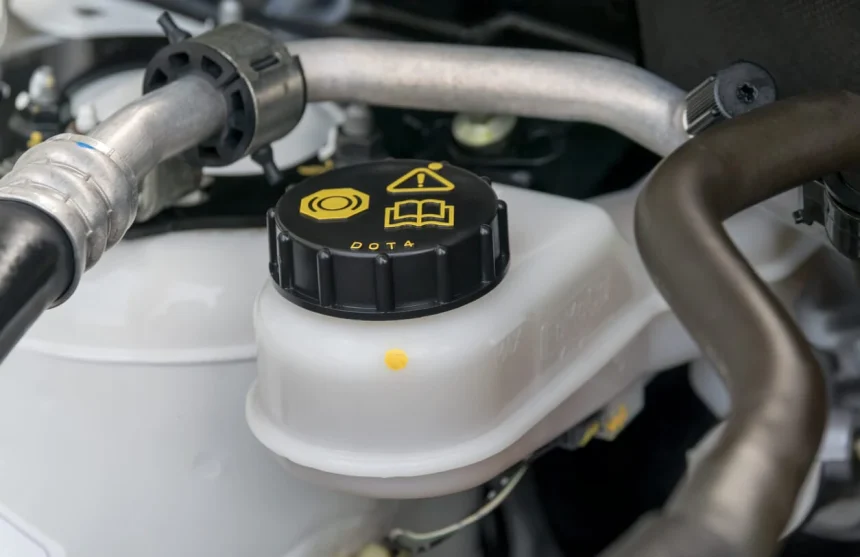
- New brake fluid (DOT 3, DOT 4, or DOT 5) as specified in your vehicle’s manual
- Brake bleeder kit
- A line wrench (usually 8mm or 10mm)
- Clear tubing
- Container to catch the old brake fluid.
- Gloves and safety goggles
- Rags or paper towels for cleanup
Step#2: Flush Brake Calipers/Wheel Cylinders
Next, you need to drain the old brake fluid. You must flush the brake calipers/wheel cylinders to do this. Starting with the brake caliper farthest from the master cylinder (usually the rear passenger side), attach the clear tubing to its bleeder valve and place the other end in a container. Locate the bleeder nipple on the back of each caliper and release it to let the fluid out.
Step#3: Empty Master Cylinder
Now, locate the master cylinder, which is usually a reservoir under the hood near the firewall. Start by removing the cap from the master cylinder reservoir. If any fluid remains, repeat the draining process to empty the master cylinder.
Step#4: Fill in Fresh Brake Fluid
Once the master cylinder is empty, fill it with fresh brake fluid. A standard car only needs about a quart of brake fluid, but check your vehicle’s specifications for the exact amount.
Step#5: Bleed the Brakes
With an assistant or using a brake bleeder kit, open the bleeder valve while the assistant presses the brake pedal. Close the valve before they release the pedal. Repeat this process until you see clear, new brake fluid flowing through the tubing, free of air bubbles.
Step#6: Top Up
After bleeding each caliper, check the brake oil level in the master cylinder and add more fluid if necessary to bring it back to the “full” mark.
Step#7: Repeat the Process for Other Calipers
Repeat this process for the remaining calipers, starting with the one closest to the master cylinder. This will ensure that all the old fluid is removed from the system.
Step#8: Safety Check
Once all calipers have been bled and the master cylinder is topped up, replace the master cylinder cap securely. Test the brake pedal for firmness before driving. It should feel solid and responsive. If it feels spongy, there may still be air in the system. Also, check for leaks around the bleeder valves and the master cylinder.
Frequently Asked Questions
1. How long does it take to change the brake fluid?
Changing the brake fluid completely can take between 30 and 90 minutes. Adding the new brake fluid is pretty simple; however, the bleeding procedure can take longer. The total time will depend on the mechanic’s skill and the type of the braking system. In some high-end cars with specialized brakes, the process might take longer.
2. How much does it cost to replace the brake fluid?
It will cost somewhere between $50 to $150 to replace the brake oil of a car. The total brake oil change cost depends on the quality of the fluid and the type of repair shop you’re visiting. More than 70% of the total replacement cost goes into labor since brake fluid itself won’t cost more than $20 in most cases. As far as the labor goes, a regular repair shop will charge you $40-$60 an hour for this, whereas a dealership or skilled mechanic may charge you up to $100 an hour.
3. How to check the brake fluid level?
To check the brake fluid level in your car, locate the brake fluid reservoir, usually found under the hood near the firewall. The reservoir will have markings indicating the minimum ‘min’ and maximum ‘max’ fluid levels. Check the fluid level against these markings.
4. What happens if you don’t change the brake oil on time?
If you don’t change the brake oil on time, your brakes may become less responsive, requiring more pressure to stop the car. Contaminated brake fluid can corrode the system components, leading to costly repairs. In severe cases, the brake system can fail completely, putting your life and the lives of your loved ones in jeopardy.
5. Why is my brake oil leaking?
There are several reasons why your brake oil might be leaking. One common cause is worn or damaged brake lines. Over time, brake lines can become corroded, cracked, or punctured, allowing brake fluid to leak. Another possibility is a faulty brake caliper. If the seals in the brake caliper are damaged or worn, brake fluid can leak out around the piston. Additionally, a loose or damaged brake hose can also lead to brake fluid leaks.

Final Word: Brake Oil Change
So, there you have it 8 steps to change the brake oil of any car. It is imperative that you carefully execute all the steps. If you feel you don’t know what you’re doing anywhere along the way, it’s better to consult a professional mechanic. The car’s braking system is not something you should take risks with; it puts you and your loved ones at risk.
Looking to import cars from China? We can help. GuangcaiAuto is your partner in importing reliable and efficient Chinese cars of all categories.
We offer cars from 60+ worldwide auto brands. With our efficient shipping and streamlined import process, bringing your dream car to your doorstep is easier than ever.
Get in touch with our sales team for more information, and don’t forget to explore our blog for the latest news and offers from the Chinese car market.
 Car knowledge
EV vs. PHEV vs. REEV; Differences Between Types of Electric Cars
With so many different options like EVs, PHEVs, REEVs, EREVs, MHEVs, BEVs, and HEVs on the market, the selection between different types of electric cars can be tough.
Let’s end this debacle once and for all. In this blog post, we’ll not only explain the key differences between various types of electric cars but also shed light on their pros and cons.
So, without any further ado, let’s get started!
| Factor | BEV | PHEV | REEV | HEV | MHEV |
| Power Source | Battery | Battery + Gasoline | Battery (charged by gasoline generator) | Battery + Gasoline | Battery + Gasoline |
| Purely Electric Mode | Yes | Yes | Yes | Yes | No |
| Range | Long | Longer | Longest | Long | Similar to traditional cars |
| Engine | No | Yes | Yes | Yes | Yes |
| Running Cost | Lowest | Lower | Lower | Lower | Similar to traditional cars |
| Charging Required | Yes | Rechargeable but not required | Rechargeable but not required | No | No |
| Maintenance Costs | Lowest | Lower | Higher | Higher | Higher |
| Charging Time | Longest | Shorter | Long | N/A | N/A |
| Battery Weight | Heaviest | Heavier | Heavier | Heavy | Negligible |
| Emissions | Zero | Low | Low | Lower | Lower |
| Availability | Increasingly widespread | Widespread | Less widespread | Widespread | Widespread |
| Purchase Price | Higher | Higher | Higher | Lower | Lower |
What is a Battery Electric Vehicle (BEV)?
A battery electric vehicle (BEV) is a purely electric vehicle simply known as EV. It does not have an internal combustion engine (ICE) and relies solely on electric motors for propulsion. EVs are laced with large battery packs that provide electric power to motors. You can charge a BEV by plugging it into an electric power source.

Advantages of Battery Electric Vehicle (BEV)
- BEVs produce no tailpipe emissions, making them environmentally friendly.
- Purely electric cars have lower running costs than other types of electric cars.
- BEVs offer immediate acceleration as motors directly power the wheels.
- Electric cars require almost no maintenance at all.
- Electric vehicles will be legally compliant with the emission rules of all countries.
Disadvantages of Battery Electric Vehicle (BEV)
- Charging a BEV takes much longer than filling up a gasoline tank.
- The absence of widespread charging networks can make EV charging a hassle.
- As EVs rely only on electric power, there is no backup power once batteries are empty.
- Replacing large-sized battery packs of EVs is quite expensive.
- Over time, the battery capacity can diminish, leading to reduced range and performance.
What is a Plugin Hybrid Electric Vehicle (PHEV)?
A PHEV combines an electric motor with a gasoline engine. It can operate in electric-only mode for shorter distances or use the gasoline engine for longer trips. They usually have smaller battery packs that kick in as needed and can be charged exactly like pure EVs.

Advantages of Plugin Hybrid Electric Vehicle (PHEV)
- PHEVs can switch to gasoline for longer journeys, reducing range anxiety.
- Plugin hybrids achieve better fuel efficiency by using both electric and gasoline power.
- Plug-in electric cars produce no emissions when operating in electric mode.
- PHEVs may qualify for government tax credits or rebates.
- Charging times for PHEVs are much shorter than those for pure-electric cars.
Disadvantages of Plugin Hybrid Electric Vehicle (PHEV)
- Although PHEVs reduce emissions, they don’t eliminate those.
- PHEVs have a more complex drivetrain than BEVs.
- The electric range of a PHEV is very short than that of a BEV.
- You still need to charge a PHEV, which is time-consuming.
What is a Hybrid Electric Vehicle (HEV)?
A Hybrid Electric Vehicle (HEV) also uses an internal combustion engine and an electric motor. They can run on electric power alone but only for short distances. Unlike PHEVs, HEVs cannot be charged from an external source. Instead, they rely on regenerative braking and the internal combustion engine as a generator to recharge their batteries. This is why HEVs are also known as self-charging hybrid cars.

Advantages of Hybrid Electric Vehicle (HEV)
- HEVs typically offer better fuel economy than conventional vehicles.
- They produce fewer emissions than traditional ICE vehicles.
- You don’t need to charge a hybrid vehicle at all.
- Hybrid electric cars have been around longer than other types of EVs.
Disadvantages of Hybrid Electric Vehicle (HEV)
- HEVs cannot operate solely on electric power.
- The emissions from HEVs are much more than EVs and PHEVs.
- HEVs have generally much higher maintenance costs than EVs and PHEVs.
- The performance of HEVs isn’t as great as EVs.
- The replacement cost of hybrid car batteries is also quite significant.
- MHEVs may not qualify for the same tax incentives as fully electric vehicles.
What is a Mild Hybrid Electric Vehicle (MHEV)?
Mild hybrid electric vehicles (MHEVs) are often confused with the HEVs. The key difference between the two is that MHEVs cannot run on electric power alone. Instead, they use small battery packs to boost the fuel economy of your car. They will feel exactly similar to any internal combustion engine car while driving. Plus, you don’t need to charge an MHEV.

Advantages of Mild Hybrid Electric Vehicle (MHEV)
- They produce fewer emissions than traditional vehicles.
- You don’t need to replace its batteries every 3-5 years like HEVs.
- MHEVs improve fuel efficiency by using motors to run accessories while idling.
- MHEVs are generally more reliable than HEVs.
- You don’t need to charge an MHEV at all.
Disadvantages of Mild Hybrid Electric Vehicle (MHEV)
- The emissions from MHEVs are much more than EVs, PHEVs, and HEVs.
- MHEVs cannot operate solely on electric power.
- The addition of batteries and motors makes the drivetrain complex.
What is a Range Extender Electric Vehicle (REEV)?
A REEV, also known as an extended-range electric vehicle (EREV), runs solely on electric power from the batteries. However, they also use a small range-extender gasoline engine as a generator to recharge the batteries while driving. Unlike EVs, you don’t have to charge EREVs from an external source. And they differ from HEVs and MHEVs because they run only on electric power instead of gasoline fuel from the engine.

Advantages of Range Extender Electric Vehicle (REEV)
- REEVs can travel further than standard BEVs.
- EREVs eliminate range anxiety by providing a backup power source.
- You can operate a REEV on electric power alone.
- When operating on electric power, REEVs produce zero emissions.
- They combine the utility of a gasoline vehicle with the environmental benefits of an EV.
Disadvantages of Range Extender Electric Vehicle (REEV)
- Range-extender drivetrains are much more complex than EVs or PHEVs.
- The additional engine can increase maintenance complexity and costs.
- REEVs consume more fuel than PHEVs due to the constant operation of the engine.
- The added weight of the battery and range extender can affect performance.
Final Word: Which Type of Electric Car is the Best?
The choice between an EV, PHEV, HEV, MHEV, or REEV ultimately depends on your individual needs and driving habits. Consider factors such as your daily commute, access to charging stations, and budget when making your decision.
Looking for an EV, PHEV, HEV, MHEV, or REEV? You can import one from China at a highly affordable price. GuangcaiAuto brings you a variety of reliable and efficient electric cars.
We offer electric, plugin hybrid, hybrid, semi-hybrid, and range extender electric cars from 60+ worldwide auto brands. With our efficient shipping and streamlined import process, bringing your dream electric vehicle to your doorstep is easier than ever.
Get in touch with our sales team for more information, and don’t forget to explore our blog for the latest news and offers from the Chinese car market.
 Car knowledge
6 Symptoms of Airlock in Car Radiator (Causes + How to Fix)
Is your car’s cooling system acting up? It might be due to an airlock in the radiator! In this blog post, we’ll dive deep into the 6 most common car radiator airlock symptoms, the root causes behind them, and 3 simple steps to fix the issue.
So, without any further ado, let’s get started!
What is Airlock in the Car Radiator?
Airlock is a condition where a pocket of air becomes trapped within the cooling system, preventing coolant from flowing freely. When an airlock forms, the engine may overheat, causing damage to components like the head gasket or cylinder head. Therefore, it is a critical issue that needs your proper attention.
6 Symptoms of Airlock in Car Radiator
Many symptoms of an airlock in the car radiator can be confused with the signs of other issues like a blown head gasket or general cooling system malfunctions. So, rather than taking each individual symptom, you must look at this scenario as a whole. Whenever you’re confused, you must visit a professional car mechanic for the diagnosis.
Here are the 6 most common symptoms of an airlock in the car radiator.
1. Overheating
An airlock can prevent coolant from flowing freely inside the radiator. This lack of coolant circulation leads to increased engine temperatures, as the coolant cannot absorb and dissipate heat. So, if you see that the temperature gauge climbs into the red zone very often, it is a sign that something is wrong with the cooling system.
But here, the key thing to notice is that when the overheating is due to an airlock, the temperature gauge won’t show an overheated engine for extended periods. Rather, it will behave erratically. At times, it’ll be normal, but sometimes it will show overheating.

2. Rapid Coolant Loss
When air enters the system, it can create pressure imbalances that lead to coolant being forced out of the overflow tank. So, if you keep topping up the coolant in your car, but it doesn’t seem to stay there, it might indicate air pockets in the cooling system.
3. Car Heater Malfunction
A malfunctioning car heater is another symptom linked to the airlock in the radiator. The heater relies on hot coolant circulating through the heater core to provide warm air inside the vehicle. If air pockets are present, they can block the flow of coolant to the heater core, resulting in cold air blowing from the vents, even when the heating system is turned on.
4. Visible Coolant Leaks
Visible coolant leaks around the radiator, hoses, or engine can be a direct result of air entering the cooling system. Air can cause pressure fluctuations that lead to coolant being pushed out of weak points in the system, such as worn hoses. Look for visible coolant stains on the ground beneath your car, especially near the radiator, hoses, and water pump.
5. Strange Noise from Engine Bay
As the coolant and air mixture move through the system, you may hear gurgling or bubbling sounds. This is caused by the air pockets expanding and contracting as the coolant heats and cools.
6. Car Not Accelerating
If your car is noticeably slower to accelerate or feels like it’s losing power, especially when under load, it could be related to an airlock. When the engine overheats due to insufficient coolant flow, it can cause the vehicle’s performance to degrade, leading to sluggish acceleration.
What Causes Air Bubbles in the Coolant Reservoir?
Here are the common causes of air bubbles in the coolant reservoir:
- Improper bleeding of coolant: When coolant is drained and replaced, air can become trapped in the system. If not properly bled, this air expands as the engine heats up, leading to air bubbles in the reservoir.
- Faulty radiator cap: The radiator cap maintains pressure within the cooling system. If it is damaged or does not seal properly, air can enter the system.
- Bad thermostat: A malfunctioning thermostat can prevent coolant from circulating properly, causing air pockets to form.
- Cooling system leaks: Leaks in hoses, gaskets, or other components can allow air to enter the cooling system.
- Failing water pump: The water pump circulates coolant throughout the engine. If it fails, coolant flow is disrupted, which can lead to air bubbles forming in the coolant reservoir.
- Blown head gasket: A blown head gasket can allow combustion gases to enter the cooling system, causing air bubbles and other serious problems.

How to Get Air Out of the Car Radiator?
Here’s how you can get the air out of the car radiator. But before you start this process, make sure that the engine is turned off and the car is completely cooled down. Plus, top off the coolant, as this will prevent air bubbles from forming during the process.
1. Locating Bleeder Valves
The first step in taking the air out of the radiator is to locate the bleeder valves. It is typically a small screw cap located on the bottom or near the side of the radiator. Look for any signs of air bubbles coming from these valves, which indicates that air is present in the system.
2. Purging the Car Radiator
Once you have located the bleeder valves, you can initiate the purging process. Start the engine and carefully open the bleeder valve. This allows air to escape as the coolant circulates.
Keep an eye on the coolant flow; once you observe a steady stream of coolant without bubbles, close the bleeder valve to prevent any additional air from entering the system. For a more thorough removal of residual air, you can also use a vacuum pump.
3. Post-Purging Check
After purging the radiator, it’s essential to perform a few checks to ensure that all the air has been removed. Here’s what you need to do:
- Ensure the coolant level in the reservoir is at the correct mark. Add more if necessary.
- If the engine temperature remains high, it suggests that air is still trapped within the system.
- Inspect the cooling system for any signs of leaks, as these can allow air to re-enter.

Final Word: 6 Symptoms of Airlock in Car Radiator
In conclusion, an airlock can lead to serious engine damage if left untreated. So, if you notice any of these car radiator airlock symptoms, you need to take immediate action. Regularly monitor the coolant levels to ensure that the cooling system is working properly.
Looking to import cars from China? We can help. GuangcaiAuto is your partner in importing reliable and efficient Chinese cars.
We offer cars from 60+ worldwide auto brands. With our efficient shipping and streamlined import process, bringing your dream car to your doorstep is easier than ever.
Get in touch with our sales team for more information, and don’t forget to explore our blog for the latest news and offers from the Chinese car market.
 Car knowledge
6 Bad Brake Pads Symptoms (Causes + Replacement Costs in the UAE)
In the UAE, faulty brakes are a leading cause of car accidents, with statistics showing that nearly 20% of road accidents are attributed to brake failure. Recognizing the signs of worn brake pads can prevent accidents and ensure your safety on the road.
In this blog post, we’ll delve into the 6 most common symptoms of bad brake pads, their underlying causes, and the estimated replacement costs in the UAE.
What are Brake Pads? How Often You Should Replace Brake Pads?
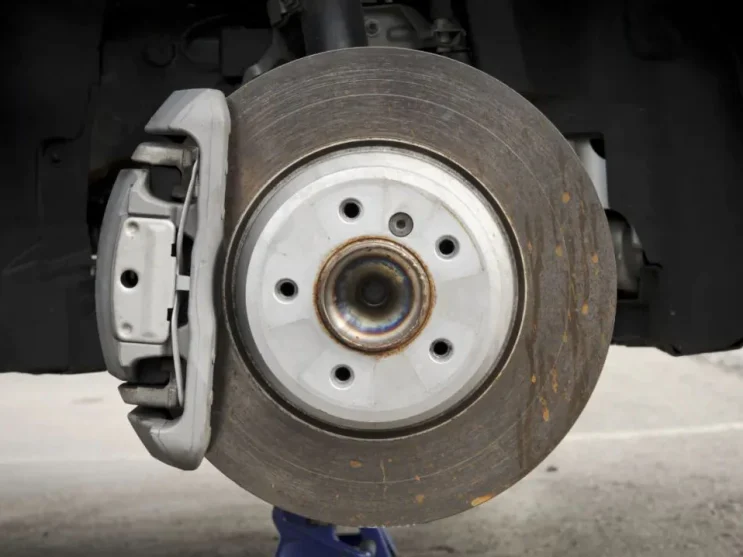
Brake pads are part of the vehicle’s braking system. They are typically made of a composite material, often containing metal, ceramic, or carbon fibers, and are designed to create friction with the brake rotors when applied. This friction slows down and eventually stops the vehicle.
When brake pads go bad, they put the lives of your loved ones at risk. Therefore, it is highly recommended that you replace your brake pads every 35,000-40,000 km. However, you should check the brake pads of your car for wear and tear at least once a month to ensure safety.

6 Symptoms of Bad Brake Pads
Here are the 6 major symptoms that your brake pads are going bad:
1. Metal-on-Metal Grinding Noise from Brakes
When the brake pads wear down to the metal backing plate, it creates a harsh grinding noise as the metal rubs against the rotor. This is a clear indication that the brake pads are dangerously worn and need to be replaced immediately. If you hear this noise, avoid driving the car until the brakes are repaired to prevent further damage to the rotors and other components.
2. It’s Taking Longer to Stop the Car
As brake pads wear down, they become less effective at stopping the car. If you notice that your car is taking longer to stop than usual, it’s a good idea to have the brakes inspected by a mechanic.
3. Vibrations in Brake Pedal
Worn brake pads, especially if they’re worn unevenly, can create a pulsating sensation in the brake pedal. This is because the pads are not making consistent contact with the rotor. If you notice vibrations in the brake pedal, it’s important to have the brake pads inspected.
4. Car Pulling to One Side
This phenomenon, often referred to as “brake pull,” occurs when the braking force is unevenly distributed across the vehicle. One of the primary causes of this issue is uneven brake pad wear; if the brake pads on one side are more worn than those on the other, the side with the less worn pads will exert more stopping power, causing the vehicle to veer in that direction.
5. Brake Fluid Leaks
When brake pads wear down excessively, they can cause damage to other components in the braking system, leading to fluid leaks. As the brake pads become thin, they can cause the brake caliper pistons to stick or retract unevenly, putting pressure on the caliper seals and brake hoses. This pressure can lead to cracks, holes, or other damage, allowing brake fluid to escape.
6. Squeaking or Squealing Noise
Some brake pads have a built-in wear indicator that produces a high-pitched squealing noise to indicate wear. This is a sign that the pads need to be replaced soon. However, not all brake pads have wear indicators, so this symptom may not always be present. If you hear a squeaking or squealing noise from your brakes, it’s a good idea to have them inspected to determine the cause.

What Causes the Brake Pads to Go Bad?
Many things can cause the brake pads to go bad. Here are a few of them:
- Normal Wear and Tear: This is the most common cause of brake pad wear. Over time, the friction between the brake pads and rotors causes them to gradually wear down.
- Overheating: Excessive heat can accelerate brake pad wear, especially in the hot weather of the UAE. However, this can also occur during heavy braking, such as in stop-and-go traffic or on steep hills, or if the brakes are not properly ventilated.
- Contamination: Brake pads can become contaminated with dirt, grease, or other substances that can reduce their effectiveness and cause them to wear down faster.
- Defective Brake Calipers: If a caliper is sticking or not releasing properly, it can apply excessive pressure to the brake pads, causing them to wear out faster.
- Excessive Weight: Carrying excessive weight in your vehicle can put extra strain on the brakes, causing them to wear down faster.
- Aggressive Driving: Driving aggressively, such as hard braking or speeding, can put excessive stress on the brakes and cause them to wear down prematurely.
- Poor Maintenance: Neglecting to replace worn brake pads or having your brakes inspected regularly can lead to further damage and increased maintenance costs.
- Low-Quality Brake Pads: Using low-quality or counterfeit brake pads can also contribute to premature wear. These pads may not be able to withstand the heat and pressure.

Brake Pads Replacement Cost in the UAE
The total replacement cost for brake pads in the UAE is somewhere between 500-2,500 AED. 70% of this cost goes into buying brake pads, whereas the remaining 30% is labor cost. There are usually four to eight brake pads in most cars. So, the total cost to replace brake pads is tied to the number of brake pads, the type of brakes, and, most importantly, the repair shop you choose.
For example, regular sedans like the Toyota Corolla have 4 brake pads. You can find a good quality set of four Toyota Corolla brake pads for 200-300 AED, while the replacement labor is another 200-300 AED. So, the total cost comes to around AED 500. However, if you own a Mercedes or any other high-end brand with specialized brakes, it can cost up to AED 2,500 or even more.
Final Word: 6 Bad Brake Pads Symptoms
By being aware of the six common symptoms discussed in this blog post, you can take proactive steps to maintain your vehicle’s braking system. If you notice any of these symptoms, don’t hesitate to have your brakes inspected by a qualified mechanic.
Looking to import Chinese cars to the UAE? We can help. GuangcaiAuto is your partner in importing reliable and efficient Chinese cars.
We offer cars from 60+ worldwide auto brands. With our efficient shipping and streamlined import process, bringing your dream car to your doorstep is easier than ever.
Get in touch with our sales team for more information, and don’t forget to explore our blog for the latest news and offers from the Chinese car market.
 Car knowledge
3 Meanings of P Button in Your Car (+Functions)
It can be a real pickle to decipher the meaning of different P buttons in a modern car!
P button in car can have several meanings depending on the vehicle you’re using. Here are the top 3 meanings of P button in your car:
- 1. Parking brake button
- 2. Parking sensor activation button
- 3. Automatic parking assist button
But how do you differentiate between each of these buttons? What do you achieve by pressing each P button? And how do you properly use each of these functions?
Let’s find out all about P buttons and P symbols in your car!

1. Parking Brake Button ( Symbol: (Ⓟ) )
If your car was produced after 2010, chances are it will have a P button for engaging the parking brake. That’s probably the most common and most frequently found P button in cars.
What Does (Ⓟ) Symbol on Your Dashboard Mean?
The (Ⓟ) symbol on your instrument cluster simply means that the parking brake has been engaged. But different models can have different symbols that serve the same purpose.
To differentiate this P sign from other P signs, look for any cones, squares, and triangular shapes in front of the alphabet P.
If there is just the alphabet P (may be circled, maybe not) and there is a bracket and few lines around it, you can be sure that it’s for the parking brake.
How Does a Parking Brake Work?
A parking brake is a type of an emergency brake. The regular use of a parking brake is to avoid the car from rolling over while in a parked position.
Parking brakes use mechanical elements that work independently from your car’s regular hydraulic, disc-based, or electronic brake systems.
It provides a kind of backup in case the main braking system fails. Parking brakes add an extra layer of protection.
How Do You Engage the Parking Brake in Your Car?
Here’s how you can properly engage the parking brake in your car:
- Wait until the car comes to a standstill.
- Now press down the brake pedal completely.
- Press the P button present on the left side of the center console.
- Now shift your automatic transmission into “Park”.
- Release the brake pedal and turn off the engine.

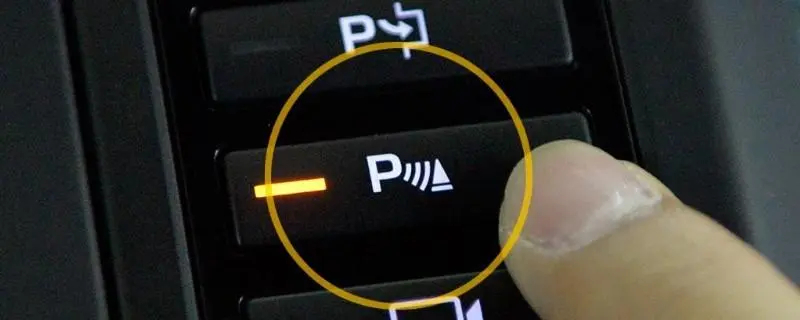
2. Parking Sensors ( Symbol: P彡△ )
Another familiar P button you see in cars today has three circular lines and a cone in front of the alphabet P. You can use this button to activate the parking sensors in your car.
What Does P彡△ Symbol on Your Dashboard Mean?
The P彡△ symbol on your dashboard means that your car’s parking sensors have been activated. Most cars today are equipped with parking sensors to help with parking.
Watch out for any kinds of cones and lines along with the alphabet P to differentiate this P button from others. The lines usually represent the signals emitted from the sensors, whereas the cones and triangles signify that it has something to do with parking the vehicle.
How Do Car Parking Sensors Work?
Car parking sensors work on a simple emitter-receiver feedback system. The parking sensors emit electromagnetic or ultrasonic waves to detect obstacles in the path.
If an obstacle is present, the waves are reflected and collected by the receiver. You get an output in the form of a beeping sound.
The beeping sound gets louder as soon as the car approaches the obstacle. This way, the driver knows that the car is approaching an obstacle.
How to Activate Parking Sensors in Your Car?
It depends on your car. Some cars have 360-degree radar systems, while others have reverse radar systems. Parking sensors are usually embedded into your car’s side panels and bumpers.
Here are the two ways to activate the parking sensors in your car.
- 1. Put your vehicle in reverse gear, and the parking sensors will automatically activate.
- 2. If that’s not the case, you only need to press the P button with cones and lines on your center console. This will activate the parking sensors.

3. Automatic Parking Assist
Cars with the latest ADAS systems come with an automatic parking assist. If you see a button with the alphabet P followed by some lines, square boxes, or a steering wheel, you can use it to activate the parking assist features in your car.
What Does the Symbol on Your Dashboard Mean?
The symbol on your dashboard means that automatic parking assist has been activated. It can be hard to differentiate between parking sensors, parking assistance symbols, and buttons.
So, I recommend consulting your car’s user manual to be sure about the functionality and level of assistance on offer. But buttons with the P alphabet followed by square and driving wheels usually mean that your car offers a certain level of parking assistance.
How Does Automatic Parking Assist Work?
Automatic parking assist works differently in different vehicles. Some cars allow for fully automatic parking, while others assist the driver.
Automatic parking assist uses the input from parking sensors and radar systems to determine if you can park the car in a particular space. After that, it checks for distance on either side and looks to avoid obstacles in the parking spot.
A fully automatic parking assist doesn’t need any input from the driver. The system acts on the data from parking sensors and applies brakes, presses gas pedal, and take corrective steering function to park the car for you.
How Do You Use the Parking Assist Function in Your Car?
The usability of the parking assist function differs from vehicle to vehicle, but here are some generic guidelines for using it:
- Back your car up to the desired parking spot.
- Activate the parking assist function by pressing the button.
- The parking assist function will check if there is enough space for parking.
- It will give instructions for speed adjustment and braking.
- Use turn signals to adjust the distance from vehicles on either side.
- Leave the steering wheel and let the system apply corrective steering action.
- Don’t leave the vehicle fully unattended, and always be cautious.
- Be ready to take over at any point.
Final Word; 3 Meanings of P Button in Your Car (+Functions)
So, there you have it. 3 meanings of P button in your car!
You can use the P button in car to carry out 3 major functions: engage the parking brake, activate the parking sensors, and use the automatic parking assist feature.
But remember that the P button in the car can have many different meanings. It would relate somewhat to the three meanings mentioned here, but the symbol and functionality might differ.
I can’t stress this enough: modern cars have problems requiring modern solutions.
As a new car owner, always consult the user manual to find out the meanings of different symbols and buttons in your car for your safety.
If there are any more questions, leave them in the comment section below, and I’ll try to respond to each and every one of them.
For more advice on car maintenance, please explore our blog.